Remote Software Update
Prerequisites
Before doing remote software update make sure that you have the following:
In this guide, you will learn how to:
- Upload a package
- Update a device with the uploaded package
- Manage automatic software updates using device groups
Upload a Package
To upload a package to the platform, you must use the command:
rebar3 grisp-io uploadThe command will deduce the release package information using the information provided in your rebar.config file.
You can find more information about the upload command here.
If the upload was successful, the following message should be displayed on your terminal:
# package-name format is <platform>.<application name>.<Version>.
# For example: grisp2.grisp_io_demo.1.0.0
Package <package-name>.tar successfully uploaded to grisp.io
When the upload is finished, a notification is also displayed on the "Device details" page (only if it was open during the upload): 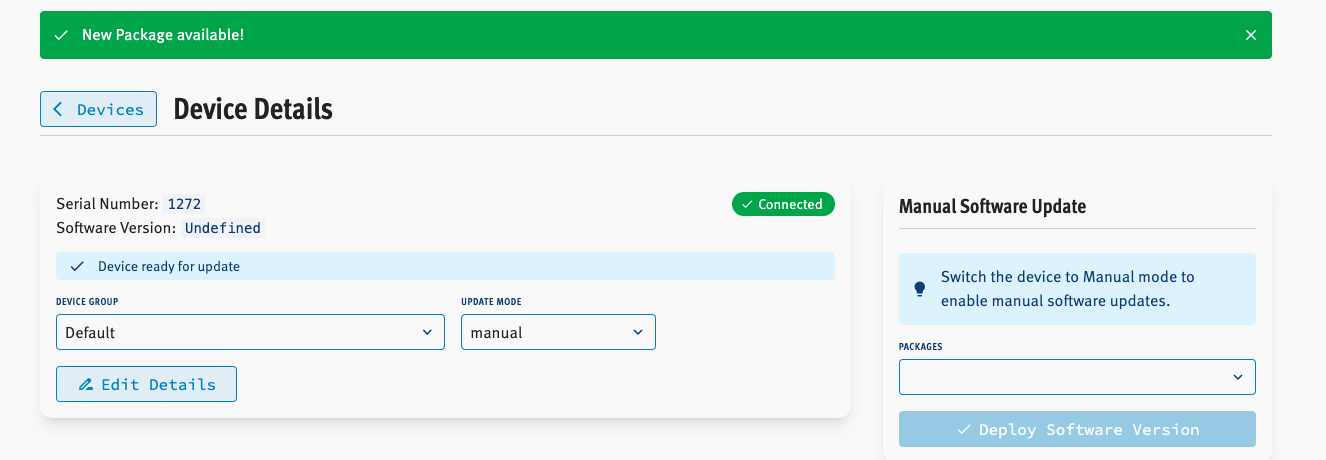
Once the package is uploaded, it should be visible on any "Device details" page in the package list under the "Software version" panel.
Update a Device
The remote update of a device is divided into three steps:
- Deploying the update
- Rebooting the device
- Validate or rollback
Deploy an update
You can deploy an update in two different ways:
- Using the GRiSP.io web interface
- Using the command line and our rebar3 plugin for GRiSP.io
Using the website
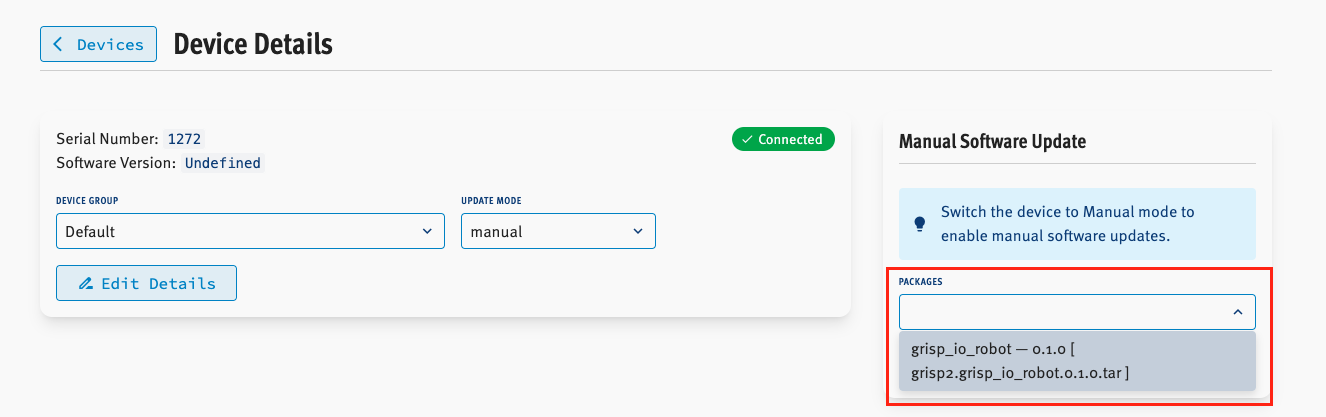
After you have uploaded your package, open the "Device details" page by clicking on the "Logs and more" button of the device you want to update. On this page, select the package you want to use for the update in the "Software version" panel.
Once you selected your package, click on "Deploy software version".
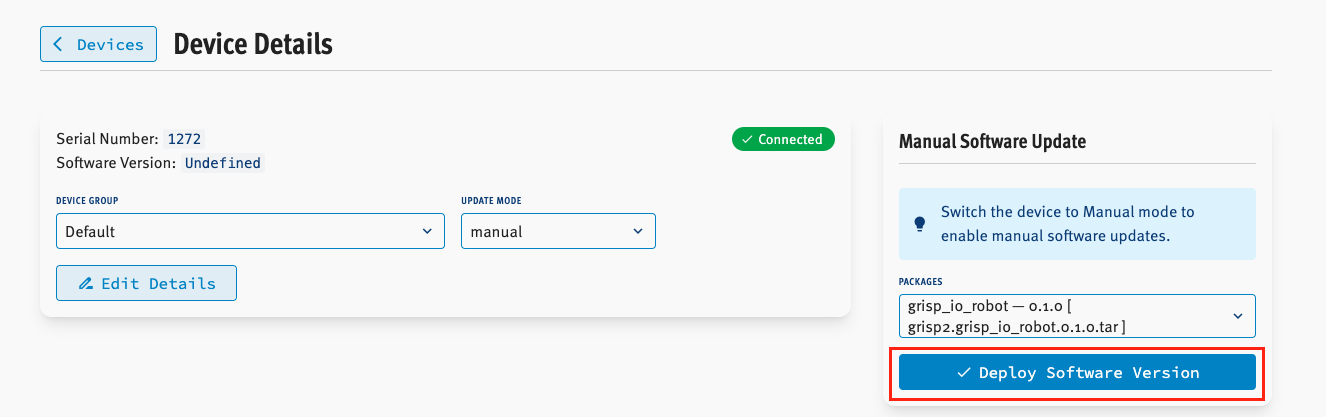
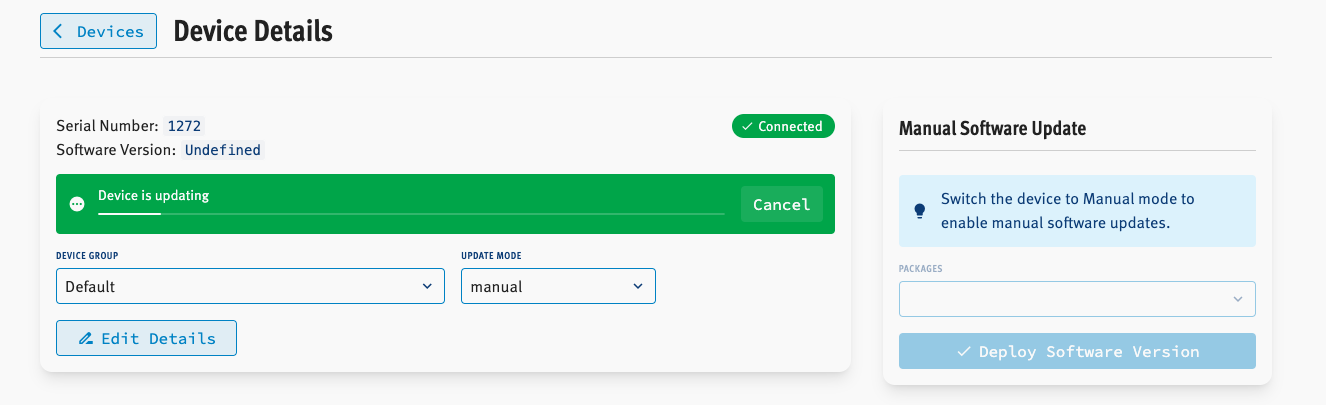
You can observe the progress of the package upload on the website.
Using the plugin
When the package is uploaded, you can deploy the update to a specific device using the deploy command.
rebar3 grisp-io deploy -d <device serial number>With this command, the package name will be deduced from the information contained in the rebar.config file.
If you want to specify the package you can use the --package or -p option:
rebar3 grisp-io deploy -d <device serial number> -p <package name>Reboot the device
As soon as the deployment is complete, you need to reboot the board. You can do that in two different ways:
💡 Tip
If there is a mounted SD card on the GRiSP board, you must remove it before rebooting.
- Click the "Reboot" button displayed on the website.
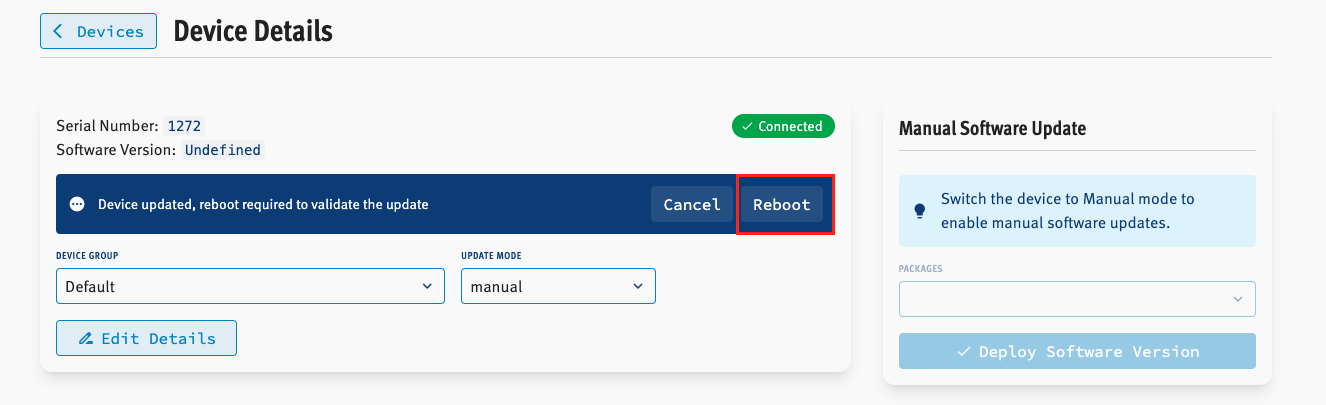
- Manually rebooting by pressing the button on the board.
Validate the update
After reboot, you have two choices:
- You want to revert to the previous version (i.e. the new version has a bug). In that case you can manually reboot the board and the board will automatically use the previous version.
- You are satisfied with the new version. In that case you need to validate the new version.
If you want to validate the update you can do it in two different ways:
- Using the website
- Using our rebar3 plugin for GRiSP.io
Using the website
To validate the update on the website, click the "Validate" button. Afterwards, if you reboot your board, it will automatically boot into the new version.

Using the plugin
To validate the update using the plugin you need to use the validate command:
rebar3 grisp-io validate -d <device serial number>Device Group and Automated Software Updates
Now that you know how to perform a remote software update, you can automate updates using device groups.
By default, every user has one group, the default group. All devices belonging to that user are automatically assigned to this group.
Update mode
Devices can operate in one of two update modes:
Manual mode (default): Updates for this device must be triggered manually. The device is not added to the update queue of its group, and no automatic updates are performed.
Group mode: Updates for this device are managed automatically. If the device meets specific conditions, it is added to its group's update queue and updated without further manual intervention.
Conditions for adding a device to the update queue
- Automatic updates are enabled for this group; see enabling automatic updates.
- The device is connected.
- The device update mode is set to
group. - The current software version of the device differs from the target version of the group.
Managing the update queue
Each device group has an update queue attached to it. The queue is configurable with the following parameters:
Error mode
- Stop (by default): If an error occurs during one of the updates, the queue will enter a suspended state. No further updates will be started until the user manually resumes the queue.
- Continue: If an error occurs during one of the updates, the queue will continue to update the remaining devices in the queue.
Maximum parallel updates
This is the number of devices that can be updating simultaneously.
Enabling automatic updates
The parameter Automatic updates allows you to enable or disable the automatic updates for a specific group.
false(by default): Automatic updates are disabled for this group. No new updates will be started and the queue is emptied.true: Automatic updates are enabled for this group.
Additionally, you need to set a target version to enable automatic updates. Without a target version, the queue will stay empty.
How Does the update queue operate?
Updates are processed in FIFO (first in, first out) order. As long as the number of ongoing updates is below the Max Parallel Updates limit, the queue continues to process updates.
💡 Tip
For automatic updates, the device reboot is handled automatically. As a user, you only have to validate each update.